Portrait Photography and Studio Lighting – Course Notes
3. HOW TO BUILD A MULTIPLE LIGHT SET-UP
4. HOW TO METER FOR STUDIO FLASH
5. HOW TO POSE YOUR MODEL FOR HEADSHOTS
6. HOW TO POSE YOUR MODEL FOR STANDING SHOTS
7. LENSES FOR PORTRAIT PHOTOGRAPHY
Download Portrait & Studio notes →
What is Light?
LIGHT is comprised of five main characteristics: quality, quantity, colour, contrast, and direction.
By QUALITY, we generally mean how hard or soft the overall light may be. Is it wrap-around or directional? Do we see harsh shadows and specular highlights or virtually none at all? Softer, wrap-around light is generally the ideal light for portraits and most photography as it happens. Houses which have north-facing windows in the northern hemisphere will always yield a soft interior light. Perfect for art and photography practice. In a studio context, we can control the quality of light with such accessories as soft-boxes, beauty dishes and shoot-through or reflective brollies.
QUANTITY sort of speaks for itself. It is literally the amount of light which is available to us. It is the only thing which we can try to control with the camera itself. However, the whole point about studio lighting is that we can control the quantity of light at its source and/or sources with multiple light setups.
COLOUR is also self-evident. But the colours we choose, when using gels in the studio, we elicit a variety of responses from the viewer. We know that red advances and also has a slightly sinister, demonic, and even violent feel to it when used in the extreme. Orange, however, is simply warm and can evoke sunset and sunrise or evenings by the fire. Blues are, of course, chilly and can again be rather sinister. Ever noticed in the movies how it’s always raining at a funeral and, more often than not, blue? Colour gels should be used with caution and thought. Remember that flash and daylight are very blue, and you should adjust your white balance accordingly.
CONTRAST refers to the quantity of different reflective values that there are in any scene. The more values there are, the lower the contrast. However, remember that as the number goes up, there will, eventually, appear to be no contrast at all. On a bleak, grey, colourless day, it may appear that there is only one value, but what is really happening is that there are so many that we can’t differentiate between them. As soon as the sun comes out in force, that number plummets, and we can find ourselves either blinded by very bright values or plunged into deep shadow at the other end of the dynamic range. An understanding of contrast and how to either replicate it or mitigate it using studio lights and light accessories is a vital part of studio lighting practice.
DIRECTION, as the name suggests, refers to the direction from which light falls onto your subject. This, naturally, is a large part of the point of studio lighting, as we have almost total control over this. However, the softer a light source, the less obvious and, in a sense, important the direction becomes. Direction is more obvious when the light itself is directional, i.e. uninterrupted and therefore quite hard, yielding hard, deep shadows. Light direction is key to the various lighting setups which are often used in a typical studio. In fact, when using one “key” light, that is, your main source of illumination, there are five very common light directions used in studios when lighting a model.
Main Key Light Directions
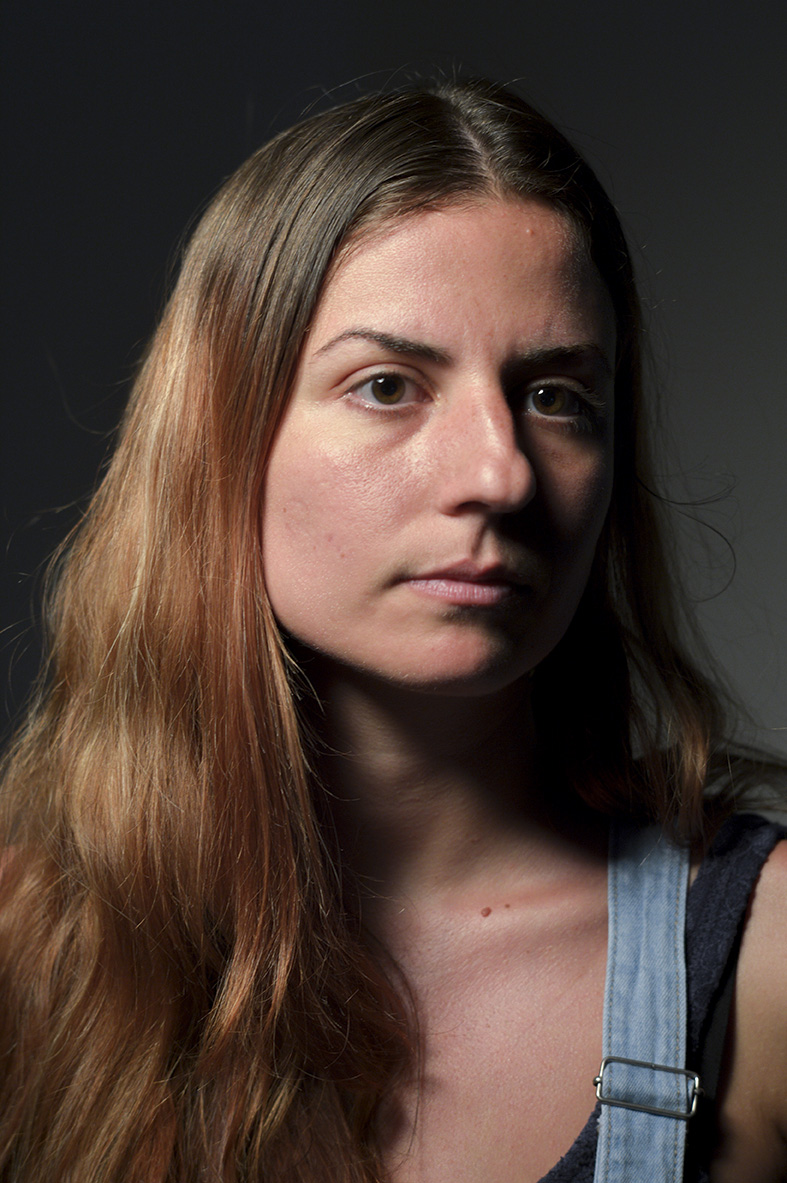
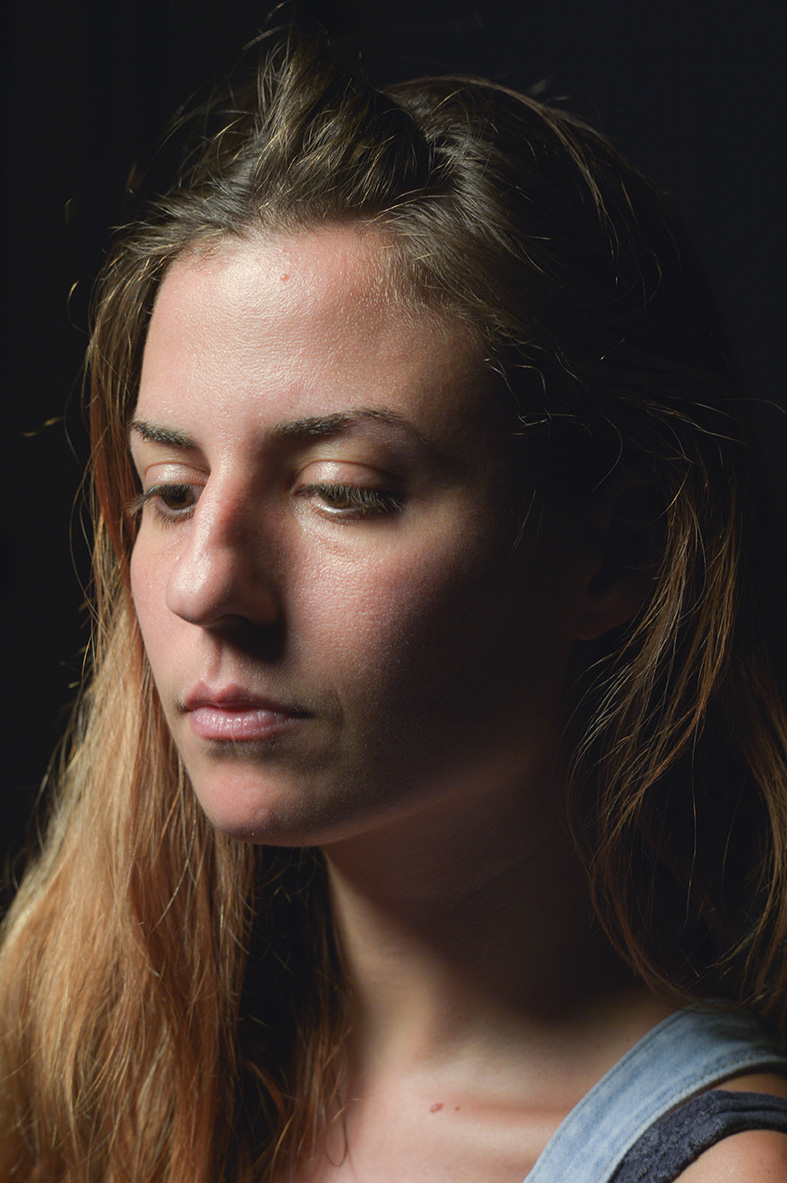
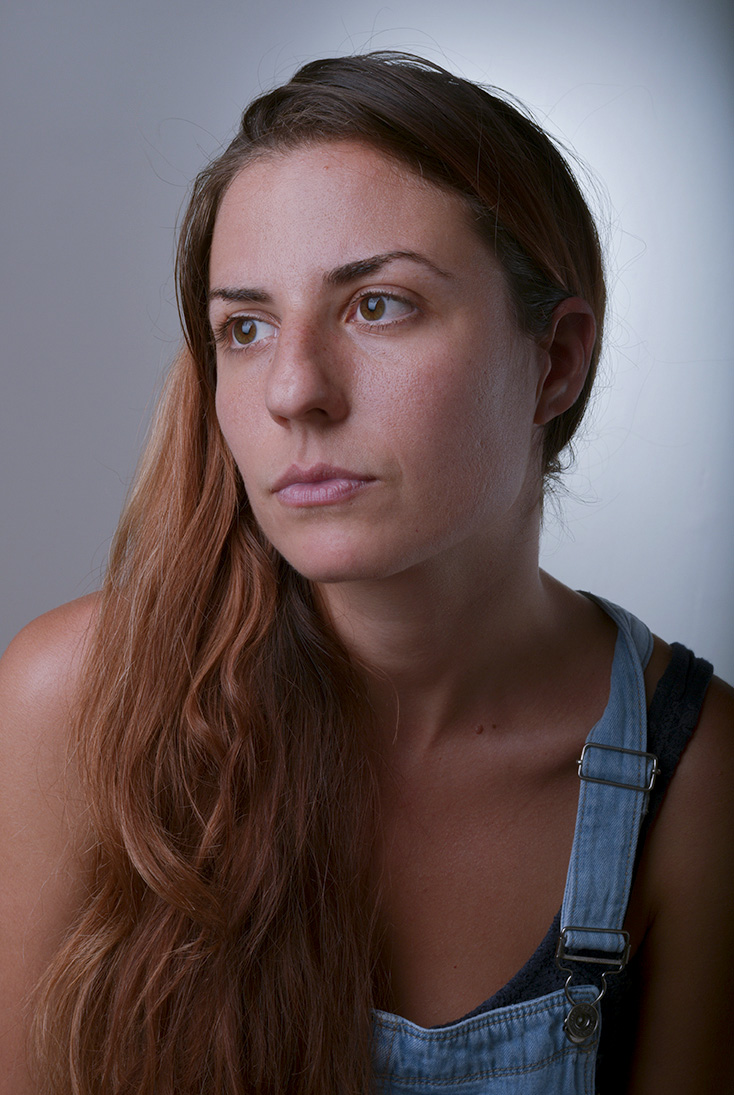
Rembrandt
Rembrandt lighting is characterised by the key light being placed relatively high and roughly 45 degrees away from the perpendicular axis. This produces a characteristic triangle of light on the shadow side of the face, along with a nose shadow that extends to the far corner of the mouth. It is a moody light generally used for character studies or more sombre fashion work.
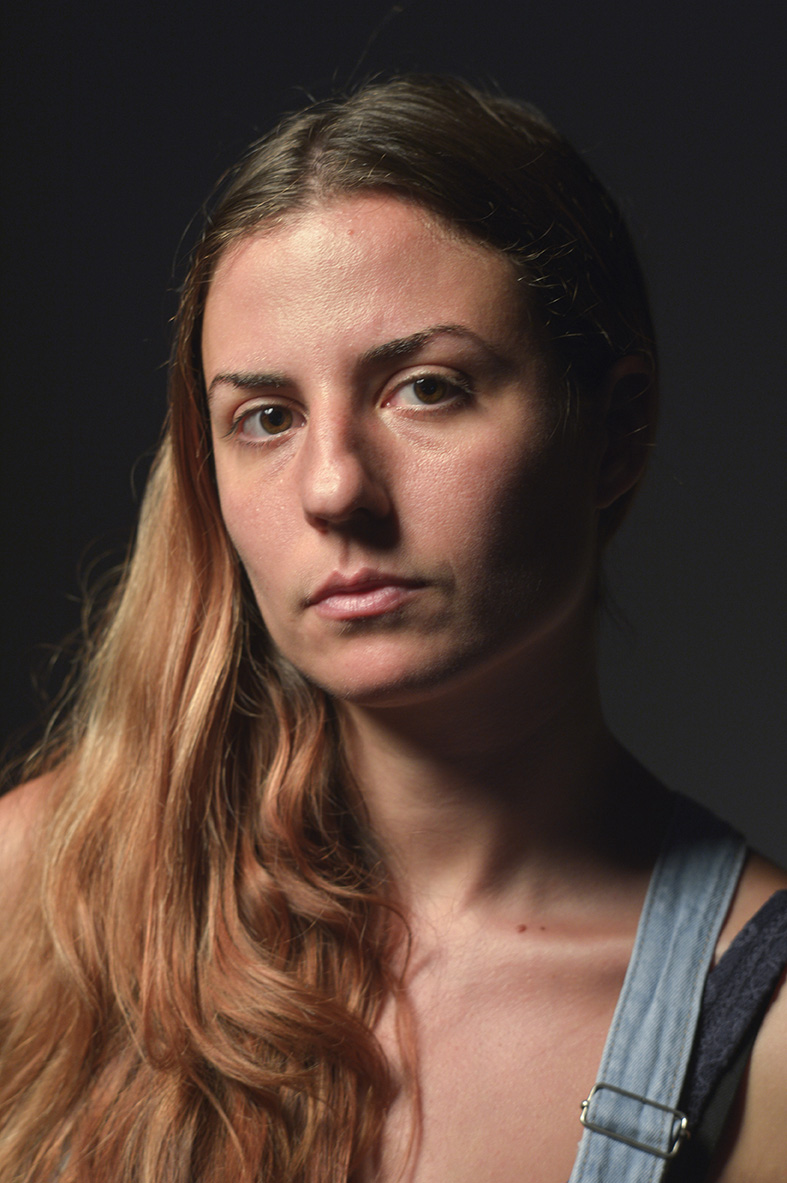
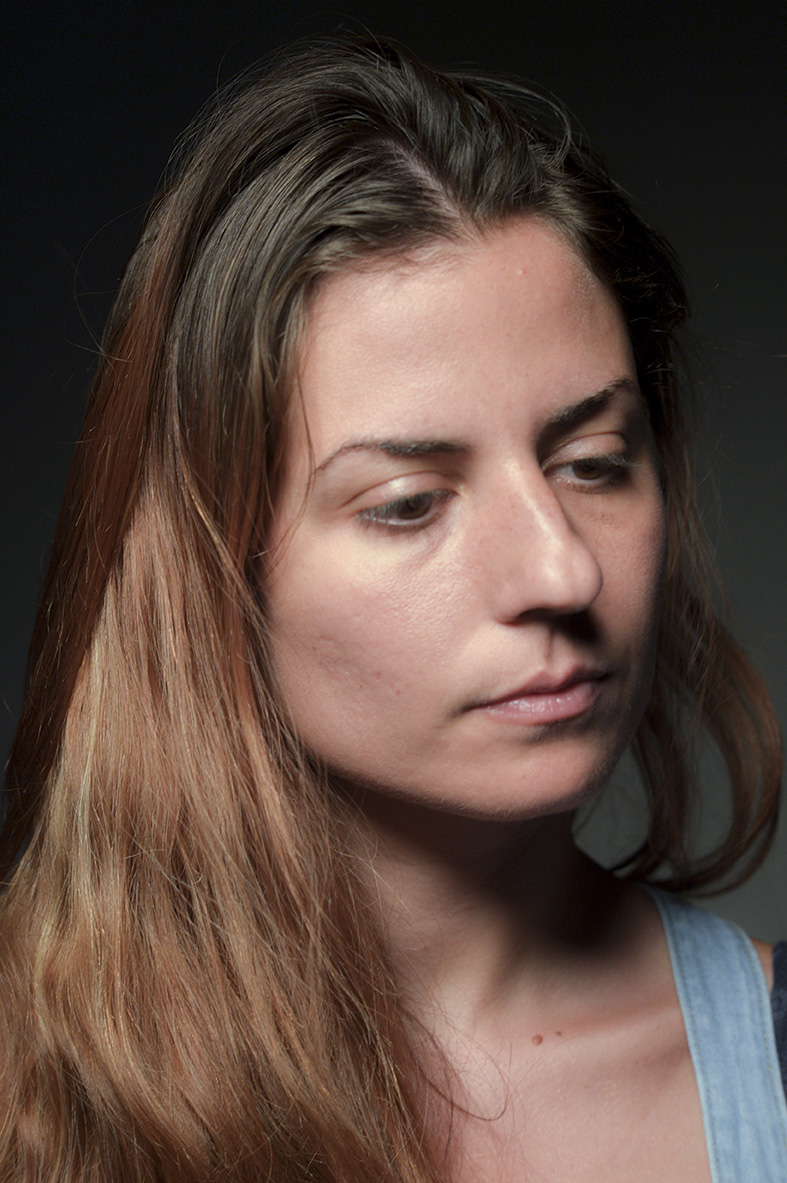
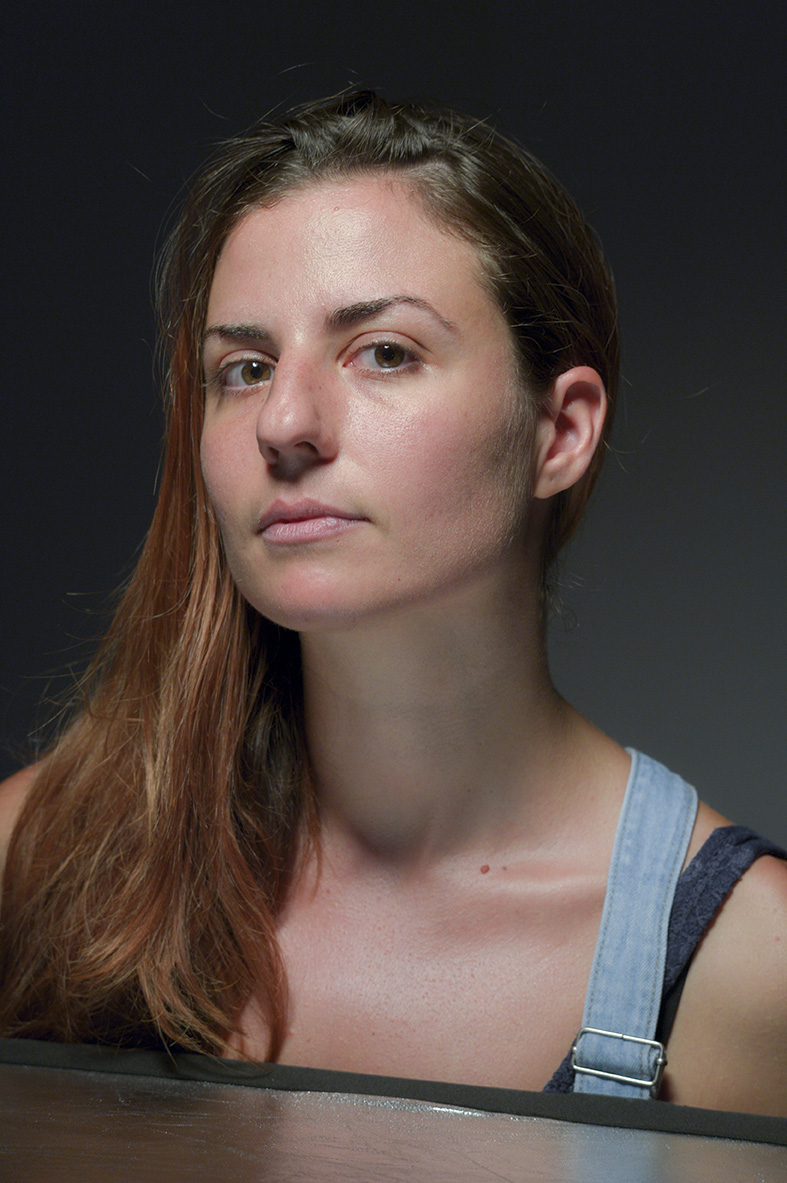
Loop
Loop lighting is very common as it is probably the most flattering. It is named after the small loop of shadow which appears beneath and to one side of the nose. Also, notice the “clean” right cheek and the long shadow on the opposite cheek. Loop lighting light nearly all of the face while imparting a sense of depth. The light is typically placed quite high and then tilted down and then placed lightly to one side or the other of the model. It’s very easy to judge where to place your light and how far to tilt it by watching the position and depth of the nose shadow.
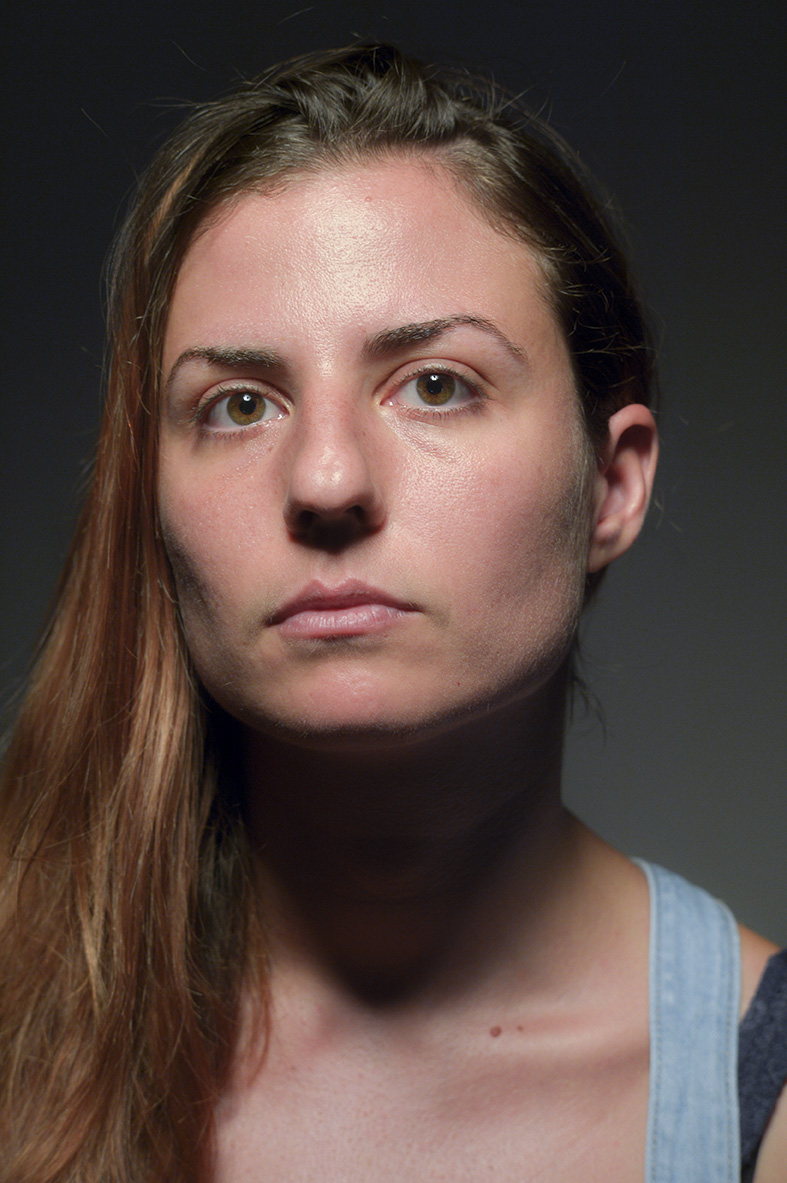
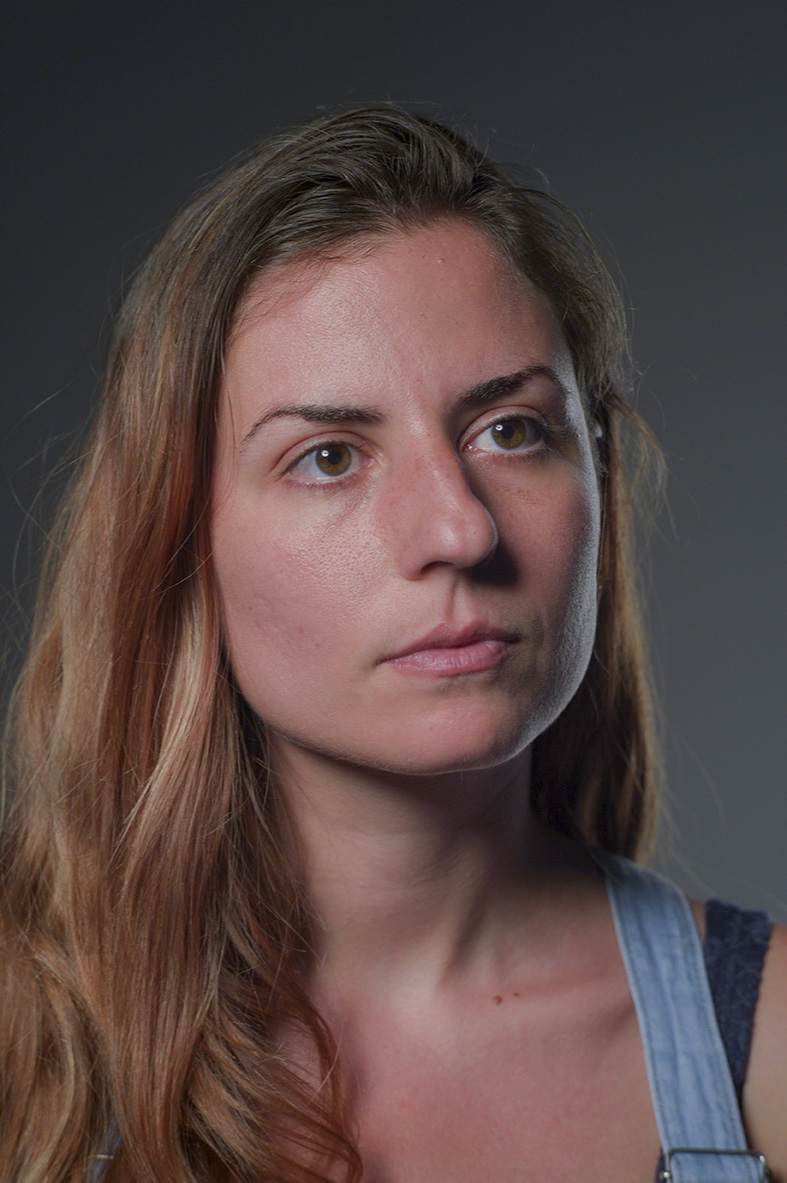
Butterfly
Butterfly lighting, also known as Paramount lighting, became a staple set up for Hollywood photographers of the 1930s. It is characterised by the butterfly-shaped shadow directly beneath the nose and the sharp sculpting of the cheekbones. It is not for everyone, and a lean, clean-cut face with prominent cheekbones is preferable. It is produced, again, by tilting the strobe down and placing it quite high and directly in front of the model. It is not a good idea to place the strobe so high or so close that the nose shadow touches or extends over the mouth.
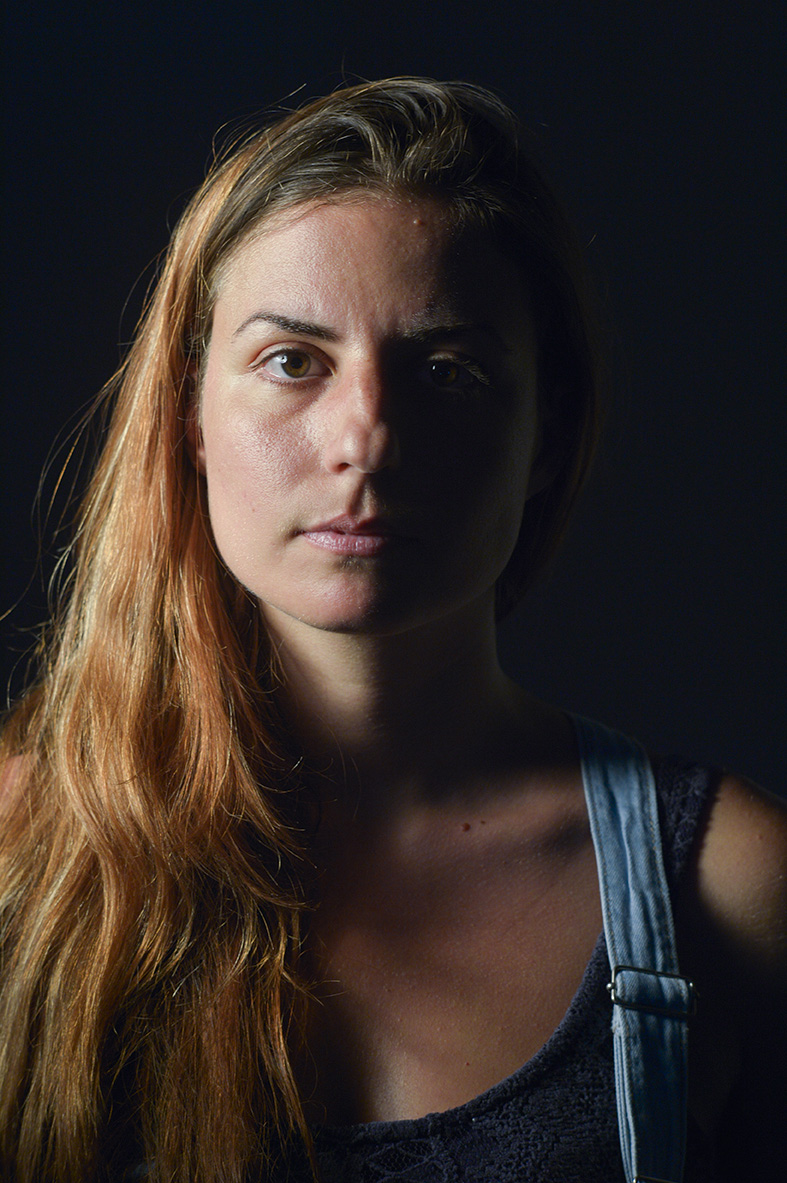
Split
Split lighting is not really a general-purpose light, although it has its uses. It is produced by placing the light directly to one side of the subject so that half the face is plunged into shadow. It can narrow the face and also partially hide imperfections in the skin. In this example, the shadow has been largely reduced, or made shallower, by the use of fill lighting.
Broad
This simply refers to a light set up where the the part of the face which is near the camera is lit. It is often a smile case of the model moving their head from one side to the other or the photographer changing their own position. As you can see, this will often yield a Rembrandt light on the far side of the face. It is a useful light but can sometimes make the lit side of the face appear fuller than it actually is, particularly with wider-angle lenses. Use with caution.
Short
The term “short” in a studio lighting context simply refers to shooting your subject from the shadow side of the face, i.e. with the lit side away from you. Going extremely “short” would eventually yield what we call “low Key” lighting with nearly the whole face in darkness save for a pleasant solver of light tracing the contours of the profile.
How to build multiple light setups
A typical light set-up with various light sources is referred to as a four-point set-up, being: a key light, fill light, accent/kicker lights and background lights.
Fill lighting
Main Light Only
Main and Fill
The fill light does exactly what it says on the tin. It fills in shadows to a greater or lesser extent. The fill light in this example was bounced off a white wall behind the camera, thus providing a flat fill. This has reduced the overall contrast of the face while not interfering too much with the actual modelling supplied by the loop lighting itself. We could just as easily have bounced off the left wall or introduced a panel to reflect some of the key light back into the left-hand side of the face.
Fill, or lack of it, is often an aesthetic choice, but it is very often the case that you have to introduce fill in order to bring the contrast within the dynamic range of the camera.
A second light as a fill source
A reflector as a fill source
Different types of fill
On axis fill
Opposite side fill
Form fill
Butterfly with fill
Kicker / Accent lighting
These are separate light sources placed just out of view, behind and slightly to the left or right of the subject, or both, as in the example above. Rim lights sculpt and accent the sides of the face by producing thin slivers of illumination.
Background light
Background light can be used to add separation between the subject and the background. In the example on the right, the light has been placed low to provide a graduated fill from the bottom to the top of the portrait. However, a neutral, even light can be achieved by positioning and correct metering of background lights.
Metering
Using a handheld meter to measure the light falling onto your subject as distinct from reflecting back at you is normally the way to go. The shutter speed is largely irrelevant when using solely flash, but be careful of checking the flash sync speed on your camera – normally between 200 – 250th of a second. Any faster and the shutter will fail to sync with the flash firing, and you will get increasing blackouts in your image.


When metering, you are generally preoccupied with the aperture and, thus, depth of field. The ISO can be kept low as you now have such a powerful light source. If you require a shallow depth of field, then you may run into problems as the flash may not turn down low enough to yield wider apertures. Move the lights back and/or use neutral density gels on the lights and/or ND filters on the lens itself.
When shooting in RAW and using your histogram, most photographers agree that we should attempt to get the most information into the image as we can. A histogram is a graph indicating the number of pixels (y) occupying various areas on the tonal range (x), which runs from black to white. The x-axis is generally broken up into four or five vertical columns. Seeing as the amount of information in each area increases exponentially as they run from left to right, it makes sense to place your highlights as far into the last column on the right as you can. Specular highlights, such as sun off chrome, or flash off spectacles etc, don’t matter. Details in, say, a white shirt or glare of a sweaty forehead most certainly do. Time for make-up! Or at least a towel.
Blown-out highlights are indicated by “blinkies”. When the metadata is turned on, these are black in the camera (for highlights) and red in Photoshop and other post-production software. The trick is to decide if these areas matter or not. When appearing on the skin of your subject, yes they almost certainly do, and you need to pull-pack your exposure until this information navigates back into the histogram.
How to pose your model for headshots
This is such a visual area that I’ve included a couple of links to very good youtube videos:
In fact, the Slanted Lens is a pretty cool channel for most things studio.
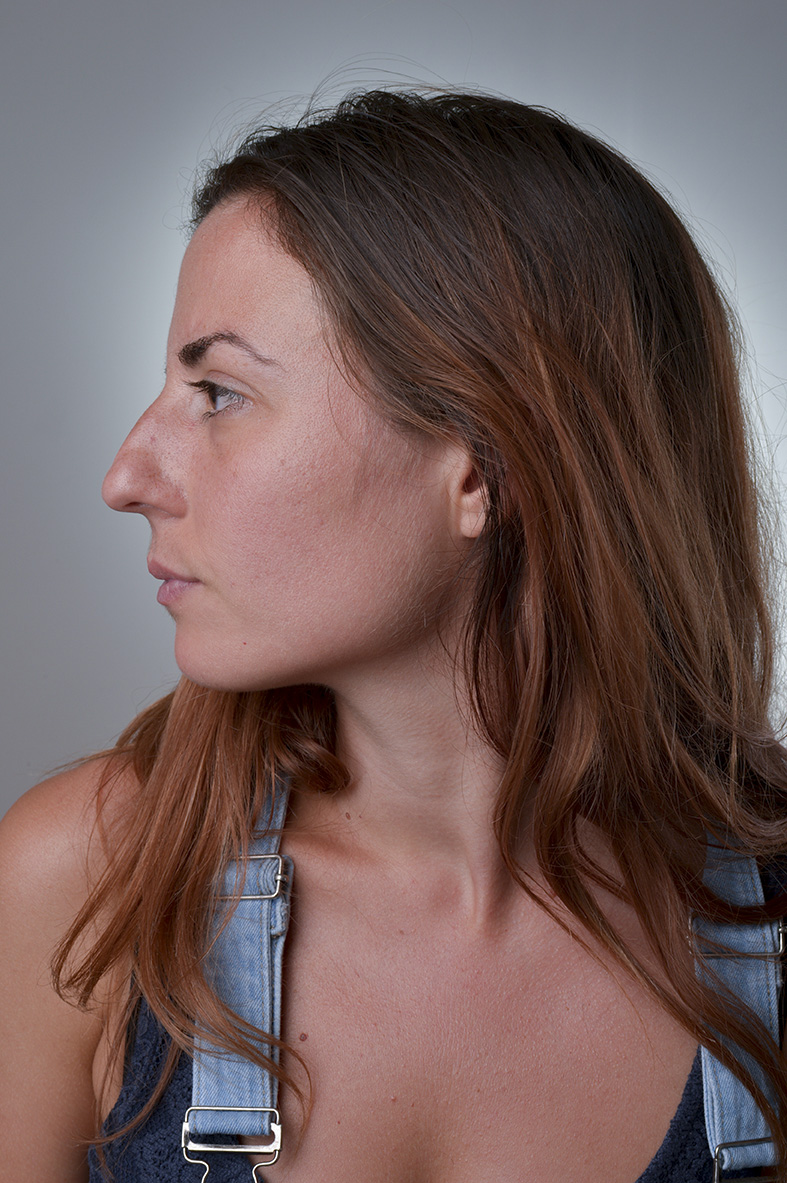
But as stated in the first link and on my course, headshots are pretty much a question of where to position the shoulder and the direction of the nose as it moves around a 180-degree axis, moving through the profile, three-quarter, direct and seven-eighths head poses.
Profile
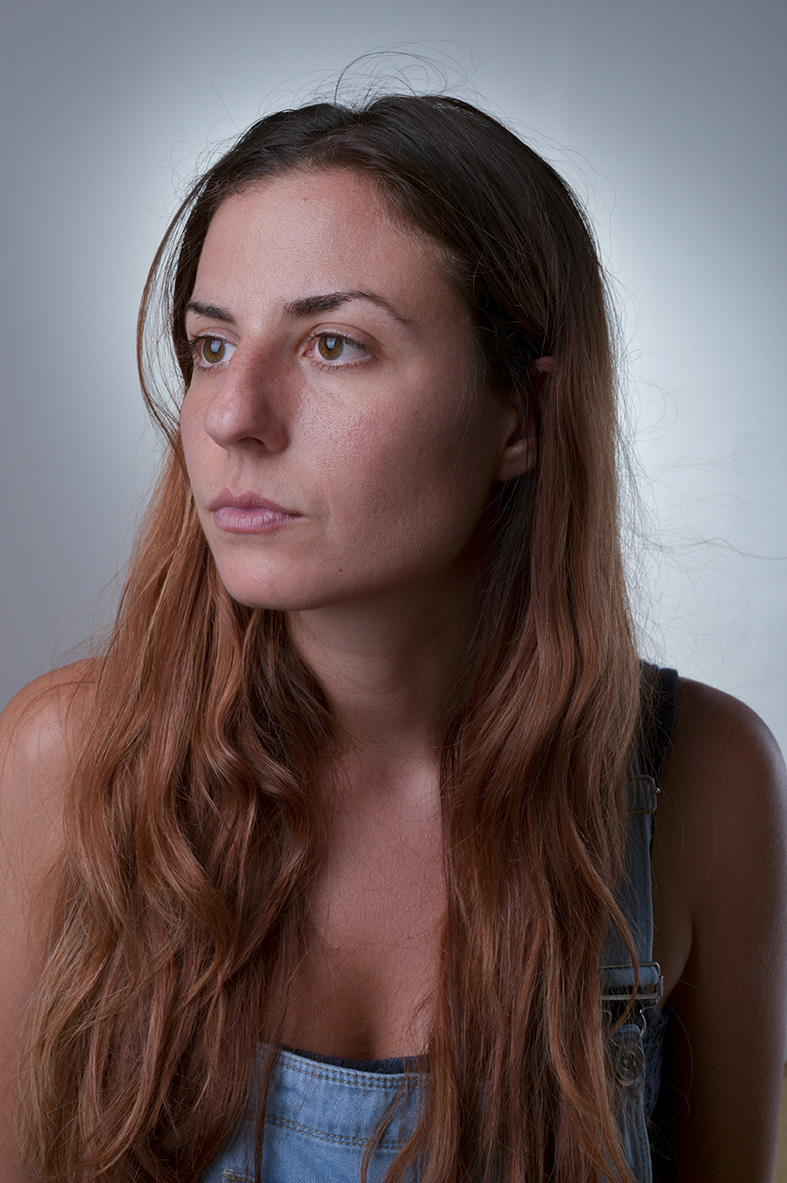
Three-Quarter
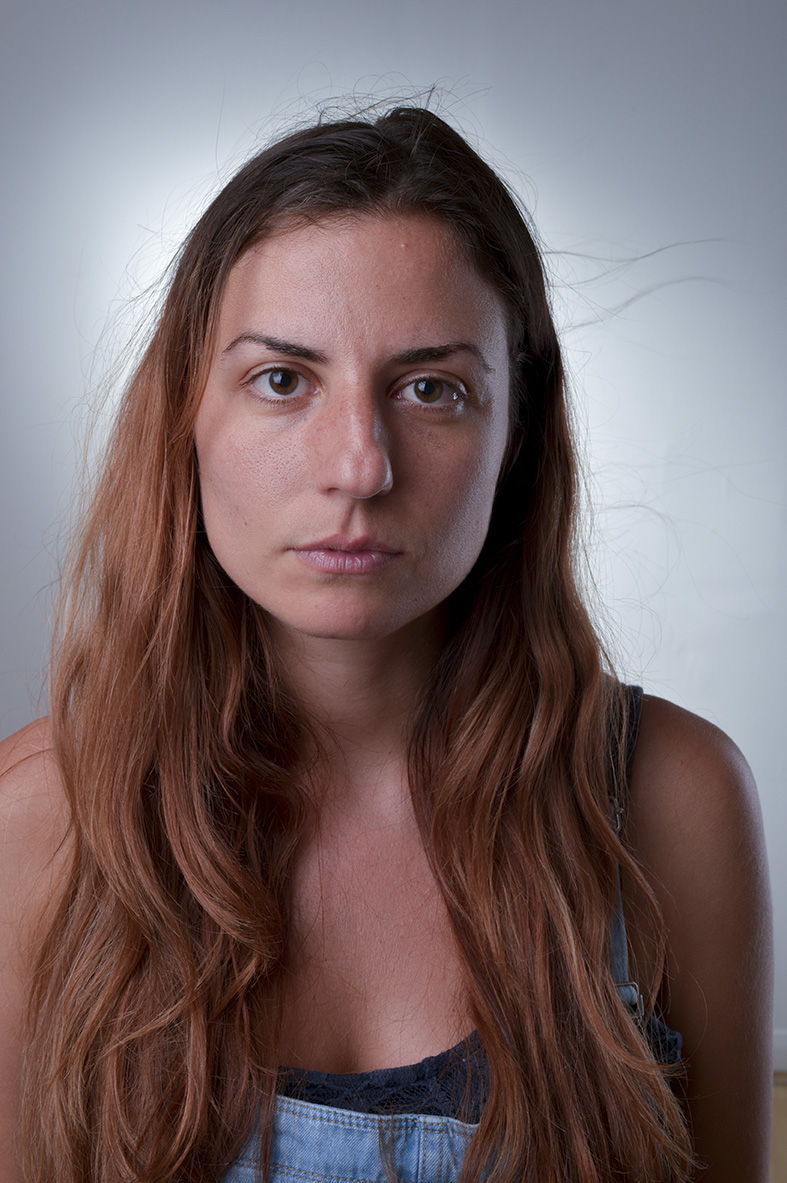
Direct
Seven Eights

Once the nomenclature has been learnt, the poses become instantly recognisable in most fashion shots; direct, three quarters etc, as does the lighting, of course. Can you now describe, in lighting and posing parlance, exactly what’s going on in the shots above? It’s a good observational habit to get into and makes shopping less of a drag! (for me, at least).
Standing poses
Standing poses are far more dynamic, volatile area than sitting poses. Most subjects, once they are relaxed, fall naturally into these poses. After all, these are poses we strike every day without even thinking about it. And that’s the problem – in a studio, we do think about it.
A top tip is to remember that it all begins with the feet. Get the feet sorted out, meaning, in most cases, the weight on one of them, and the rest of the body generally falls into more natural poses. Then turn your attention to the shoulders and head, similar to the headshots, and you’ll find that the hands naturally find their own place. Remember how we went about it on the course.
For examples of sitting poses and full-length portraits, please visit our Pinterest page – make sure you bookmark it as we update it frequently.
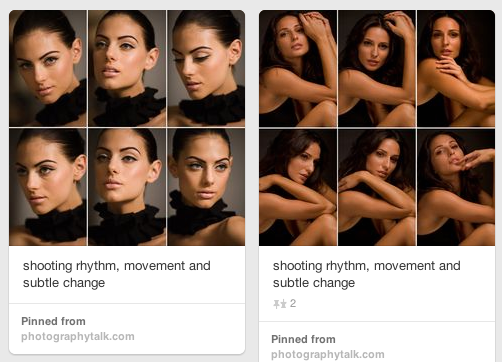
http://www.pinterest.com/dslrphotocourse/posing-guides/
OK, I hope that all helps.
Good luck!
Jason